Debugging
Sometimes it can happen that you set some attributes wrong in Webflow. During the conversion process, we do not verify attribute values. So be careful with what you write in there. Here are some tips and tricks to help you get your theme up and running.
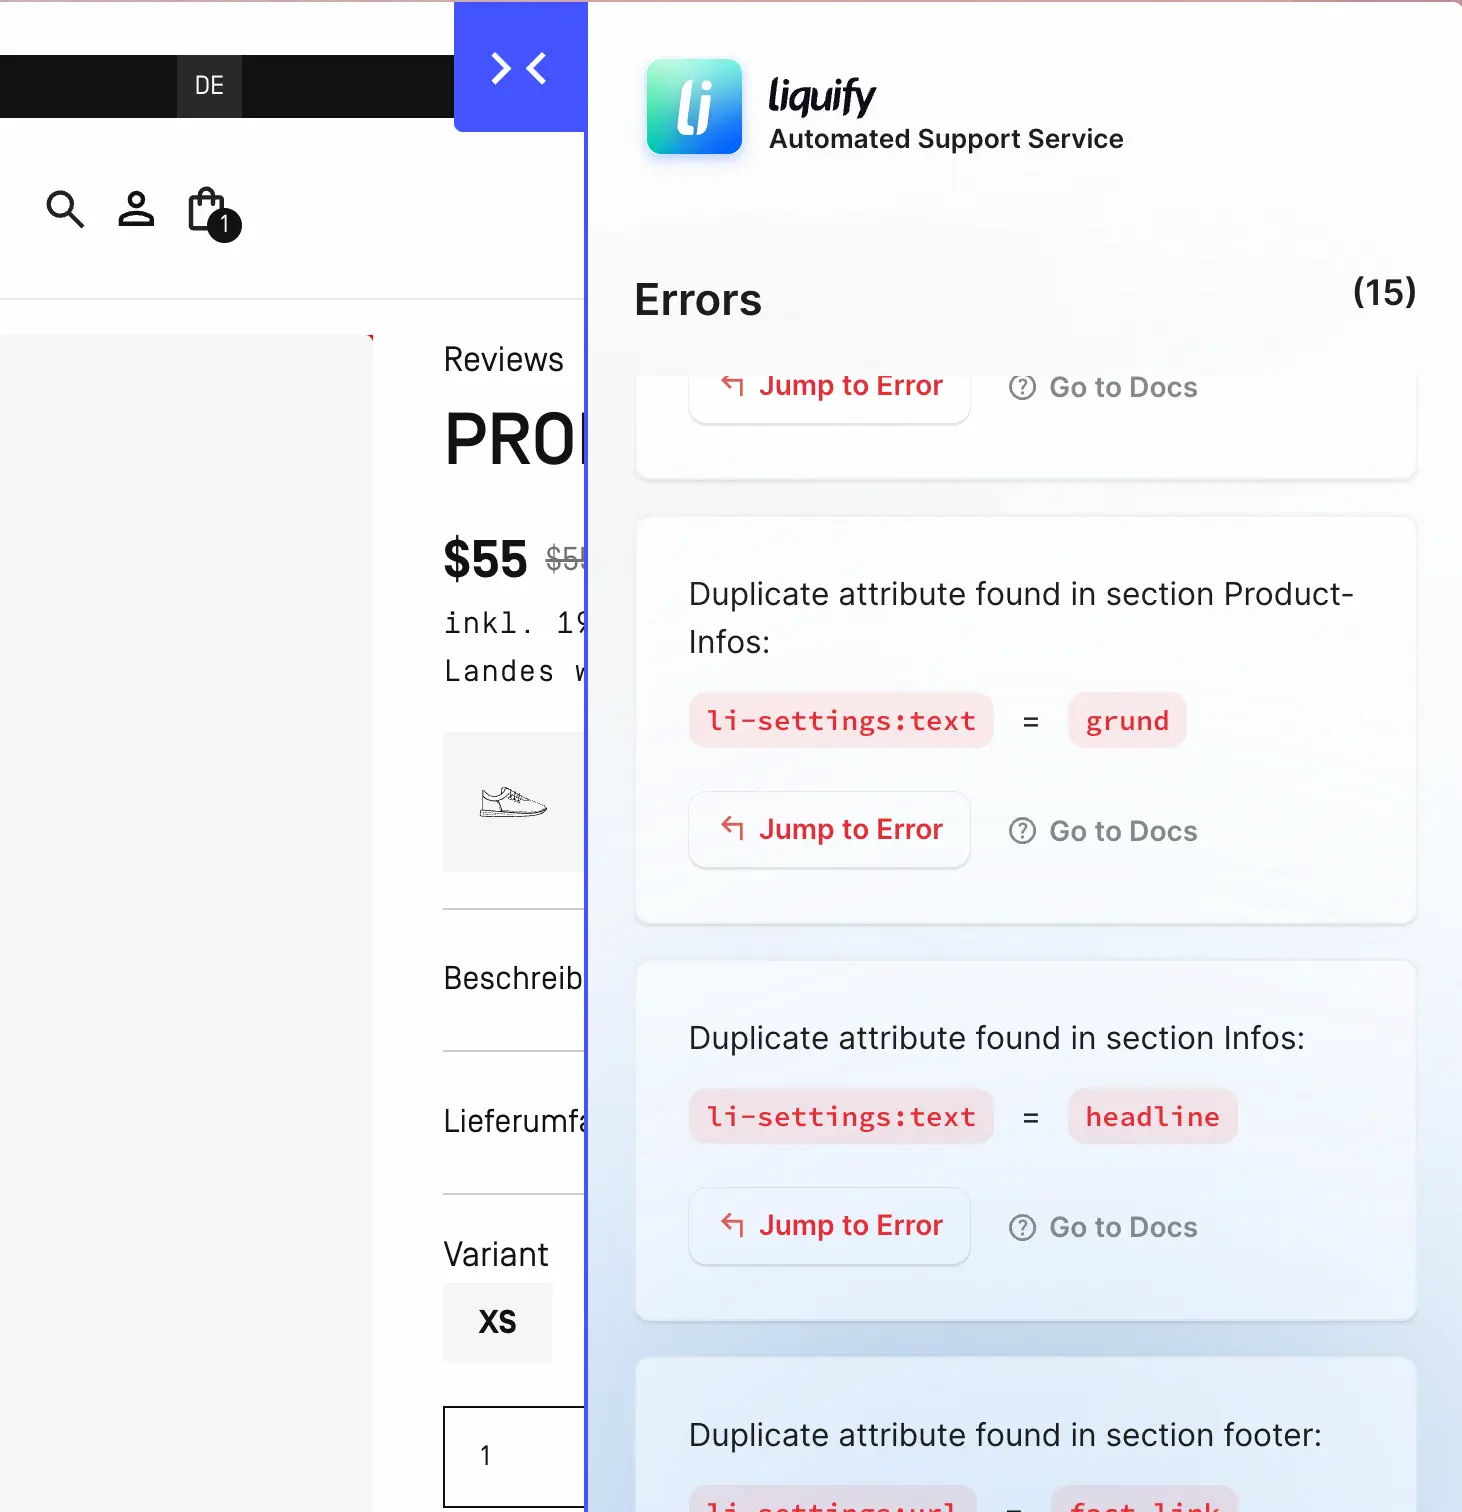
Liquify Automated Support Service
When working in Webflow, you can always publish your site and visit the staging domain. After implementing the Liquify script from the project settings in the <head>, you will see the Liquify Automated Support Service. Press “Run Attribute Check” to view all bugs on the current page.
Tipp:
With this configuration, a small icon will automatically appear minimized in the top right corner of your Webflow page. To make it automatically visible, remove the auto and min attributes. It will only appear on .webflow URLs.
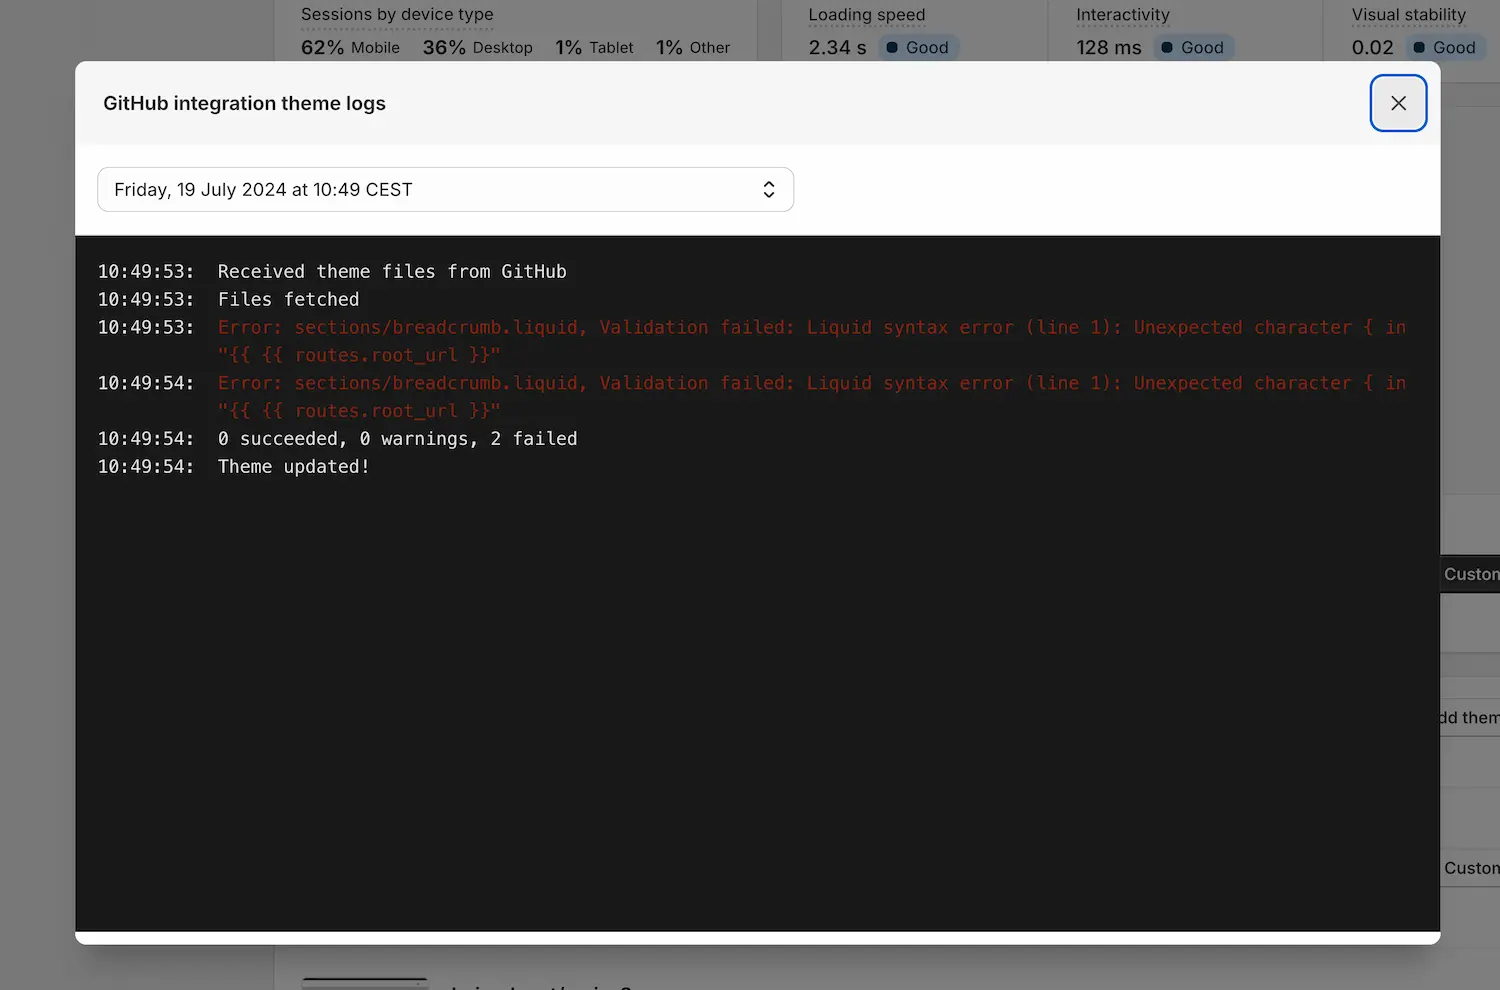
Shopify Logs
When working with GitHub integration, you can always check the logs in Shopify. These logs provide valuable insights into any Liquid errors and their locations. You can switch between commits using the dropdown menu. If Shopify identifies an issue, implement the solution in Webflow and convert again.
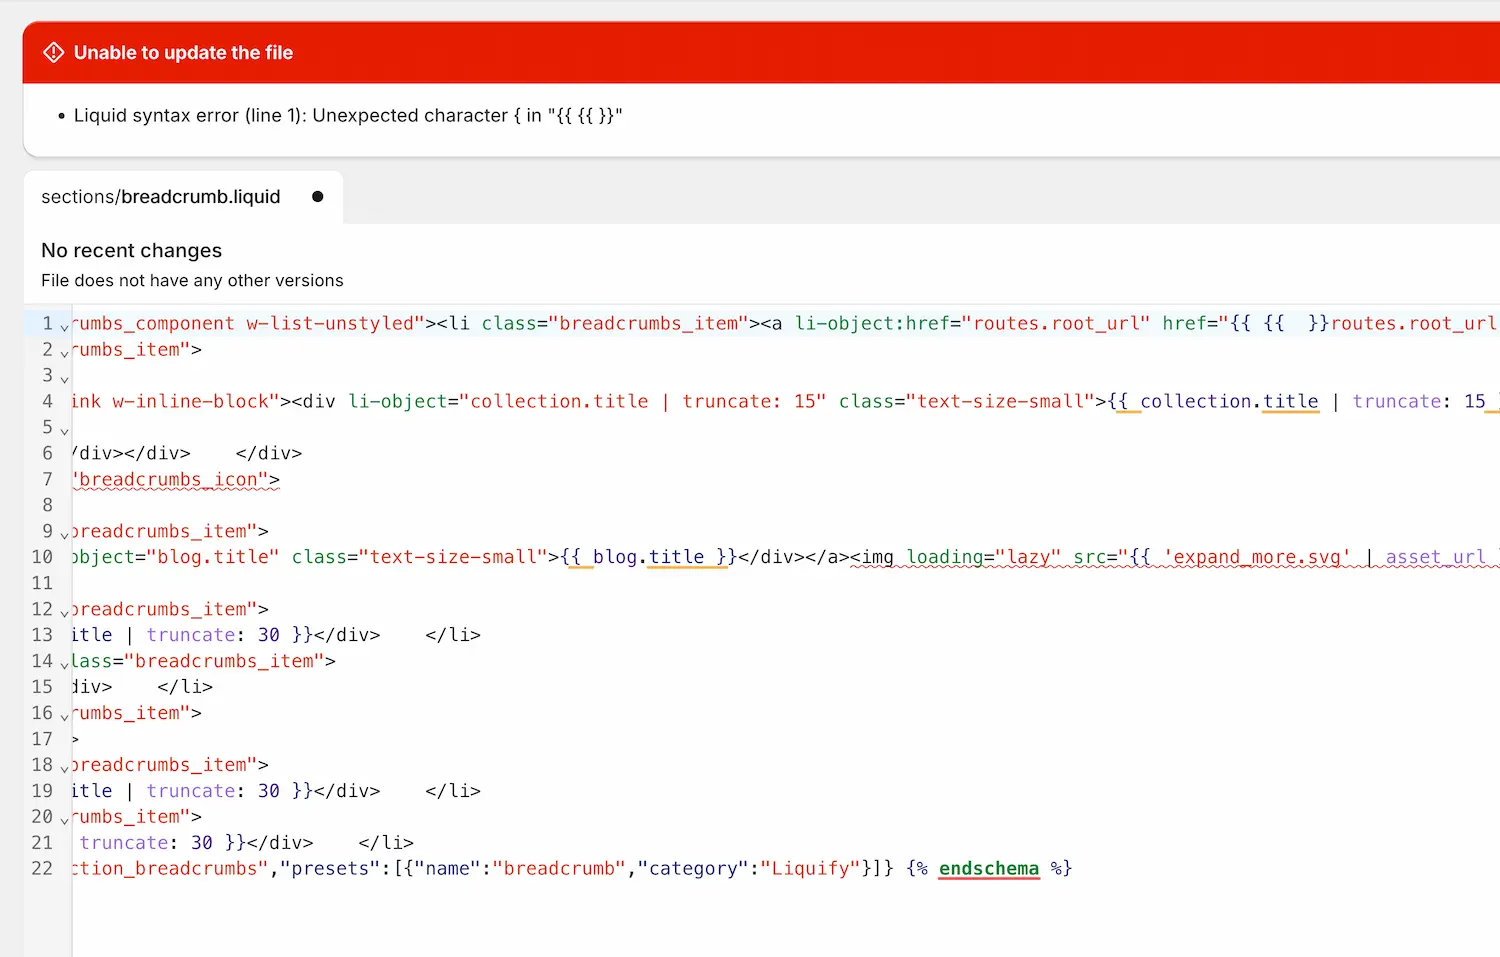
Debugging in Shopify without GitHub
When you manually upload the Shopify theme, Shopify won’t import files that contain errors, making debugging a bit challenging. However, you can always open the Shopify Code Editor and search for missing pages. Create the file manually and paste the code into the new file. Shopify will then indicate what is wrong with your file.
No errors occurred, but the page looks incorrect?
When using the GitHub integration to convert a theme, it might look different from Webflow even if no errors occur. Shopify may need some time to process the new CSS information in the Theme Editor. To see the updated page immediately, check the Page Preview, where the new CSS file will be applied.
ZIP file is too large?
If your ZIP file is too large, it’s usually because you’ve uploaded heavy image files into Webflow. To resolve this issue, delete the images in Webflow and use a placeholder image tagged with li-settings:image="SETTING NAME". This way, you can add the images later in the Shopify editor.
Join our Discord Community
Sometimes, finding the solution isn’t easy. Let the community help you.
Shopify 1.0 vs Shopify 2.0
Learn more about the differences between Shopify 1.0 and Shopify 2.0 and how to use it.