Getting started
Core Principals
Liquify Pro uses Webflow's Custom Attributes as its foundation. Through the instructions contained in the Attributes, we understand which Liquid variables you want to use, where and how. In doing so, Liquify Po relies on Shopify's theme framework and includes all essential pages. It's best to begin with the Liquify project starter kit.

What is liquid?
Shopify Liquid is a template language used by the Shopify e-commerce platform to customize and render dynamic content for online stores. It's a lightweight, easy-to-learn language that allows developers and store owners to control how data is displayed and organized on their Shopify store's pages. Liquify Pro gives you access to all Shopify Liquid functionalities, enabling you to visually write Liquid code using custom attributes.
Shopify Liquid templates consist of a combination of tags, objects, and filters. Tags are used to control the logic and structure of the template, while objects represent data like products, collections, and customers. Filters are used to modify and format data before it's displayed.
Using Liquid, you can create custom storefronts, build unique product pages, design custom themes, and tailor the user experience to meet your specific needs on the Shopify platform. It's a flexible and powerful tool for customizing the appearance and functionality of an online store.
Webflow custom attributes
You can access custom attributes through the settings panel of the selected element. A custom attribute always requires a name, with values being optional. Within the name, you specify the type of data you wish to display (e.g. li-object, li-settings, li-if, li-for, etc.). Within the value, you define the content of the element (e.g. product.title, collection.description, cart.items, etc.). In the subsequent steps, you will discover the various types of li- tags you can employ.
- Consider Webflow as the blueprint for your store. Work with placeholders and add content later in Shopify. Your goal is to maintain a small, high-performing Shopify theme.
- You don't need to dive deeply into Liquify Pro attributes. Your go-to resource is the Shopify documentation, since you'll be working with Shopify Liquid. You can also find solutions in the Shopify forum or documentation and then reconstruct them using Liquify Pro tags directly in Webflow.
- All elements must be inside within li-sections. Failing to do so can cause errors and prevent proper functioning of Shopify 2.0.
- At times, it's beneficial to debug directly within Shopify before implementing it in Webflow. For instance, when searching for the correct metafield output, this approach allows you to instantly verify the results in real-time without waiting for the conversion process.
- When labeling settings, use names that your customers can easily understand and that clearly describe what the setting controls. You can also reuse these names in other sections. For instance, consistently labeling a headline as "Headline".
Template Structure
The Liquify Pro starter Template comes with a pre-defined structure for your Template. All the pages shopify needs for a working theme are already setup and working. The pages are tagged with a li-page tag which defines which pages refers to which purpose. These tags are already applied in our Starting theme.
Here is a List of all available page templates by Shopify:
- 404
- article
- blog
- cart
- collection
- account
- activate_account
- addresses
- login
- order
- register
- reset_password
- gift_card
- index (always the Home page in Webflow)
- list-collections
- page
- password
- product
- search
Pages without a li-page tag are considered as Shopify pages and are converted as page.templates. When you don't want a site to be converted, simply add the tag remove :
By default, every li-page generates its own layout file. This can result in a large number of unnecessary files. However, if you’re not modifying the <head>, <body>, or anything outside the li-content-for-layout element, you can use the li-layout attribute directly on the li-page element. This tells the converter to skip creating a new layout file for that page.
You can now simply reference the layout you want to use for this page:
Shopify 2.0
To unlock the potential of Shopify 2.0, make sure all your page content is organized into sections (tagged with li-section tag, learn more here). The page structure should match the image below. Just remember not to change the html tag main oft the main wrapper. You can always rearrange everything inside main in Shopify later on.
Liquid Objects
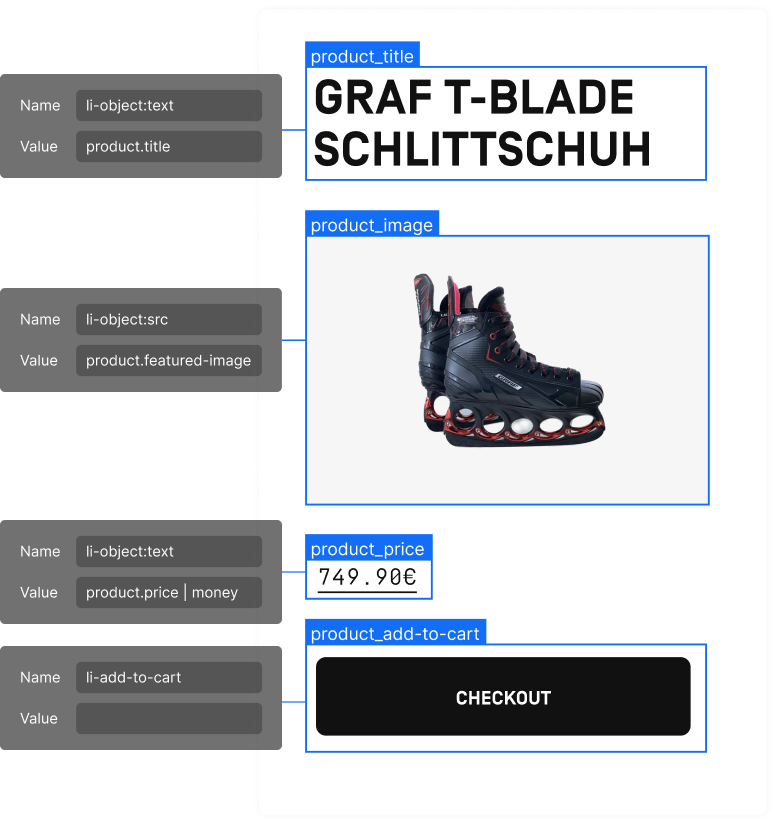
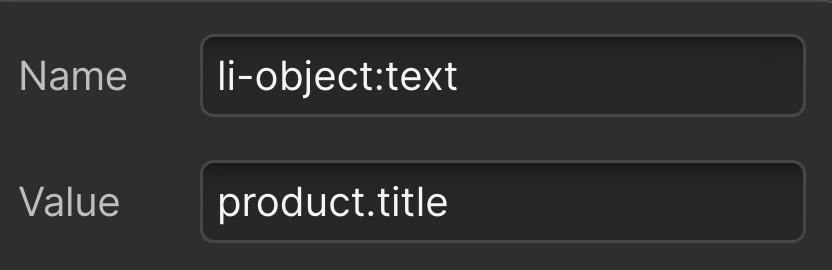
The CMS content of your shop can be accessed using objects such as product, collection, or cart. You can place these objects in Webflow using the li-object tag. So a custom attribute for the product Title would look like the following:
This will be converted into:
In this example, the product is the object, and you can access detailed information using dot notation (for instance product.title or product.selected_variant.price). You can explore all the available Shopify objects here. Additionally, don't forget to check out the Shopify Cheat sheet for a more condensed reference.
Positioning
With an additional modifier, you can also determine the object's positioning. For example, on a product link:
This will be converted into:
For the positioning you can use all the HTML attributes which are available or create your own data-attributes. Here are some common HTML Attributes:
- src (for images)
- class
- value
- placeholder (for forms)
- alt (for images)
- width
- height
- text (It's not an HTML attribute; however, both li-object and li-object:text yield the same results)
- style (for this attribute it makes more sense to use li-attribute)
- name
Tipp:
You can also place multiple objects with different modifiers on a single element, such as a src and alt attribute.
Liquid Tags
Liquid tags, in the context of the Shopify Liquid template language, are special markers enclosed in curly braces and percentage signs, like {% ... %}. These tags are used to perform various control and logic operations within the template. Liquid tags are responsible for executing specific actions, such as loops, conditionals, and more, to dynamically generate content or perform operations on the data.
To use this functionality in Webflow, we have prepared the following tags. These tags will always wrap the div they are attached on.
You can't apply multiple liquid tags (li-for, li-fd, li-unless) to one element. If you need that, you should use the :inside modifier to display the tag inside the div it's applied.
Lists (iteration)
When you need to iterate over an array, such as a list of products or product tags, you can employ the li-for tag. This tag will duplicate the attached element. Within a loop, you have access to the object you're iterating through.
For instance, when looping through a list of products, you can retrieve all the product information using dot notation (e.g. product.price).
This will be converted into:
<div>{{ product.price }}<div>
{% endfor %}

For the positioning you can use the :inside modifier. Then the converted code will look like this:
This will be converted into:
{% for product in collection.products %}
{{ product.title }}
{% endfor %}
</div>
If and unless (Conditional)
li-if: Using this tag, you can show an element when a specified condition is met. For instance, you can verify the availability of a product, and if the condition is true, you can display the "Add to Cart" button or a specific tag.
This will be converted into:
<div class="product_tag">Sold out</div>
{% endif %}
Therefore, Shopify gives you a bunch of operators you can use to check if data is true or contains something. Here is a list of all the operators:
- ==
- !=
- >
- <
- <=
- >=
- or
- and
- contains
li-unless: With this tag, you check if the condition is false. The functionality is the same as li-if.
This will be converted into:
<div class="product_tag">Sold out</div>
{% undunless %}
Case
When you want to display an element which should meet different conditions, you can wrap these elements with the li-case tag. Inside the wrapper, you put the elements with different li-when tags.
Within li-case, you can only include elements with the li-when attribute. The value of this attribute specifies the condition to be met. If you leave the last li-when tag empty, it will act as an else condition. For Example:
This will be converted into:
{% case product.type %}
{% when 'T-Shirt' %}
<div>T-Shirt</div>
{% when 'sweater' %}
<div>Sweater</div>
{% else %}
<div>Other products</div>
{% endcase %}
</div>
Liquid Filters
With liquid filters, you can modify the output of your content. You can calculate values, format a string (text) and so much more. You can find a list of all filters here or in the Shopify Cheat sheet.
Filters can be applied to a li-object value by using a pipe symbol | followed by the desired filter. Here's an example of how to show the product price in the store's currency.
This will be converted into:
Most common filters
Below, you'll find some of the most frequently used filters by us, giving you an idea of the possibilities.
- | money
- | date: '%B %d, %Y'
- | plus: 15
- | img_url: master
Filters may seem overwhelming initially, but you can find clear documentation for all their functionalities in the Shopify Docs.
Tipp:
You can also place multiple filters on one object. For example, li-object = product.price | money | plus: 15
Liquid Settings
In addition to Shopify objects, you can implement settings that allow your Shopify content editor to modify both the content and appearance directly within Shopify. To achieve this, we've introduced the li-settings tag. Using a modifier, you can access all of Shopify's provided Settings Inputs.
In Webflow, we use the content in the element as a pre-filled placeholder. The custom attribute's value corresponds to the settings' name in the Shopify editor for easy identification. So you can define it however you want.
This will be converted into:
.webp)
Setting Elements
This is a list of li-settings modifier you can use. Each modifier gives you different input options in the Shopify Editor.
- li-settings:text
- li-settings:textarea (creates a bigger input area)
- li-settings:richtext (creates a bigger input area with formatting options)
- li-settings:image (this will automatically add an alt tag)
- li-settings:url
- li-settings:checkbox (can hide the element which it's applied to)
- li-settings:collection (apply it to a product item to display a category)
- li-settings:blog
- li-settings:article
- li-settings:product
- li-settings:html
- li-settings:custom (check below)
Expert Tipp:
You can also use li-settings:custom to create other Settings for your clients. Just add li-settings:custom="example-name" to a Webflow Embed and place the Section-Settings-Schema inside of it. In this Example, we create a Range slider
"type": "range",
"id": "font_size",
"min": 12,
"max": 24,
"step": 1,
"unit": "px",
"label": "Font size",
"default": 16
}
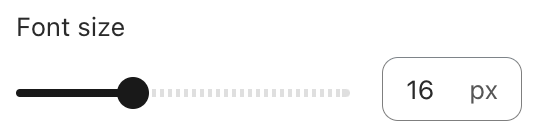
You can now use the Setting inside your Section like this: style="font-size: {{ section.settings.font_size }}"
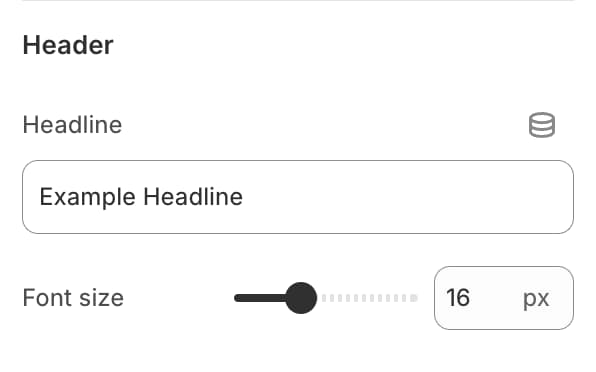
The value of the attribute will be used as a header for the Editor. This makes it easier to organize and group related settings inside one embed, so everything looks cleaner in the Shopify Editor. If you don’t want a header to appear, simply leave the value of li-settings:custom empty.
To do this, just turn your settings JSON into an array, like this:
"type": "range",
"id": "font_size",
"min": 12,
"max": 24,
"step": 1,
"unit": "px",
"label": "Font size",
"default": 16
},
{
"type": "text",
"id": "headline",
"label": "Headline",
"default": "Example Headline"
}]
Sections
Each li-settings tag needs to be enclosed within a section. For sections, we've introduced the li-section tag, which you can apply to your Webflow sections. You have the flexibility to choose a name for it, with a maximum limit of 30 characters.
Section Groups
Section groups are typically used for the header and footer. They are JSON data files that define a list of sections and app blocks along with their settings. Merchants can add, remove, and reorder these sections within the theme editor.
Simply add the li-section-group attribute to a <div> element and place your sections inside it — for example, the Navigation section.
- Section groups are not allowed inside the li-content-for-layout element
- Section groups can’t have the same name as other section
- Changes made to the section group will be reflected on all pages where the group is used
To define the type of a section group, use the li-section-group:type attribute. This helps Shopify determine where the section group is used. Accepted values:
- header
- footer
- aside
- A custom type, in the format
custom.<name>, where<name>is a unique identifier for your section group type.
Enable or disable Sections in the Shopify Editor
Enable: If you want to show certain sections only on specific templates, you can use the tag modifier li-section:on_templates. In the value, list all the templates where the section should be shown, separated by commas. To show the section on all templates, just use *.
You can do the same for section groups using the tag modifier. To target all groups, just use * in the value.
Disable: If you want to hide certain sections on specific templates, use the tag modifier li-section:off_templates. List the templates (comma-separated) where the section should be hidden. To hide the section on all templates, use * in the value.
You can do the same for section groups using the tag modifier. To target all groups, just use * in the value.
Blocks
Blocks offer a dynamic method for repeatedly adding a single element, and they can include all the options mentioned earlier. Think of them as a means to infuse genuine dynamic functionality into some of your elements. For instance, you can use blocks to construct a dynamic slider by adding the block to a single slide of the slider.
In doing so, each block created by your customers will result in a new slide being generated. It's important to note that, similar to sections, options can be added within blocks, but not directly to the block itself. To create a block, simply add the attribute:
li-content-for-blocks provides a flexible way to use multiple blocks within a wrapper. Inside li-content-for-blocks, you can add multiple li-block elements with different functions, like a paragraph, headline, or button. In the Shopify Editor, users can choose how many blocks to use and arrange their order.
Within this element, you can only place items that have the attribute li-block="custom-name". Within the block elements, you can use all the available settings attributes. For example:
Theme Blocks
li-content-for-theme-blocks offers an even more flexible way. It’s based on Shopify’s new feature that allows blocks to be nested.
Instead of using the regular li-content-for-blocks, you can now use li-content-for-theme-blocks.
When you use this, the converter creates an extra Blocks folder and turns blocks into reusable components that can be nested inside one another.
Inside this element, you can only add items that have the attribute li-block="custom-name". Within these block elements, you can use all available setting attributes — and you can even nest another li-content-for-theme-blocks inside.
Limitations to keep in mind: You can only use one li-content-for-theme-blocks per section (Shopify doesn’t allow more). Blocks can be nested up to 8 levels deep.
App Blocks
Expert Tipp:
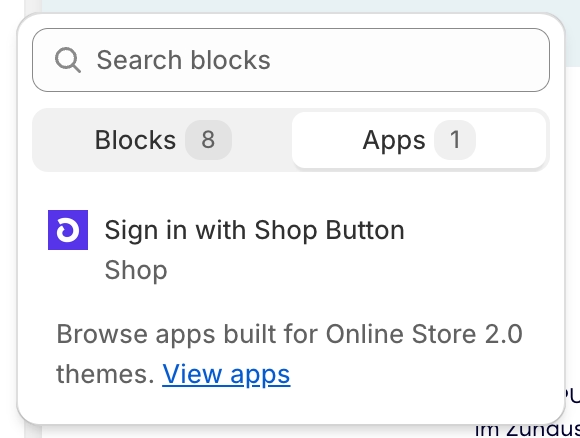
When using li-content-for-blocks, you can also include App Blocks. If you have an app installed that supports App Blocks, they will now appear in the Shopify Editor.
Forms
Shopify offers a range of forms tailored for various purposes, including login, signup, cart, address, newsletters, and many more. To create forms in Webflow, use the li-form tag, which should be applied to the corresponding form element. In the value field of the custom attribute, specify the form type.
Additionally, to direct users to a specific page after form submission, you can include another attribute with the modifier :return_to.
This will be converted into:
// your form content
{% endform %}
In this example, you'll also notice that a class is passed to this element. We retrieve the class from the element to which the form tag is applied.
Within the form, you can incorporate input elements tailored to the specific form you wish to create. These inputs require unique names, which you can reference in the Shopify documentation and soon in our own documentation.
Most forms are already included in the Starter Template, making it convenient for you to reference them whenever needed.
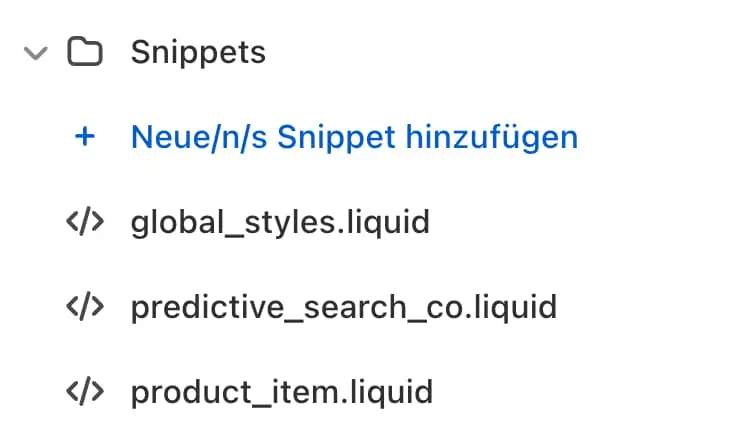
Snippets
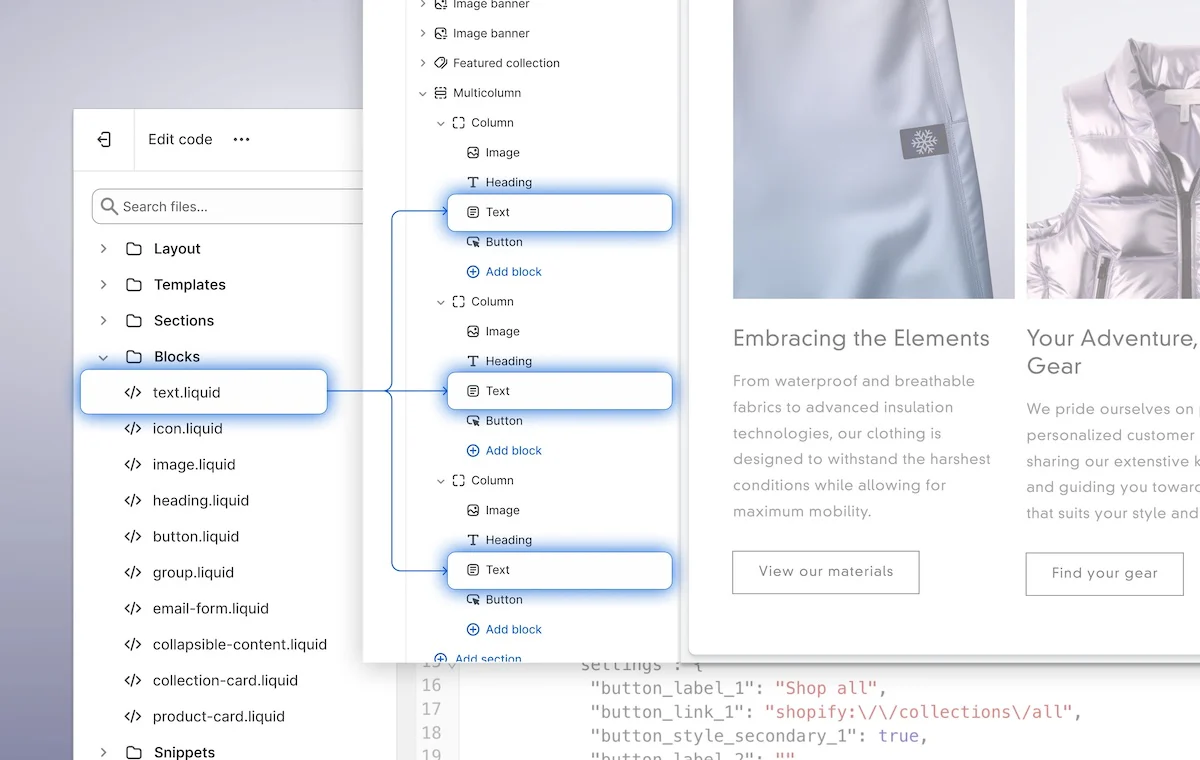
To make your Shopify theme code even cleaner we implemented the tag li-snippet. You can think about it as symbols in Webflow. The Snippet will get its own file in the theme directory and can be pleaced multiple times all over your theme. This makes sense, for example for the product item or the global styles element. Just make a symbol out of the element you want to use somewhere else. Than add the li-snippet tag with value you can choose (Character limit 15)
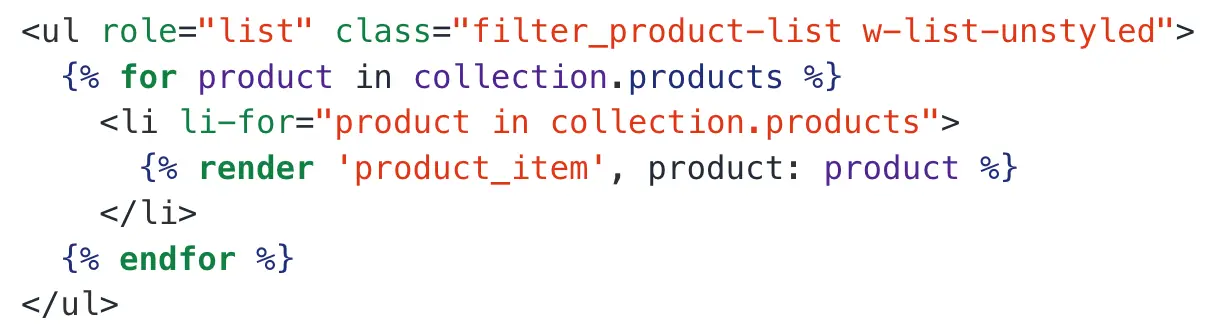
When using li-object within a snippet, it's essential to pass the corresponding object into that snippet. Just add another custom Attribute to the Element. For instance, you can use our modifier to pass the product into the snippet. Here's an example of how to do it:
This will be converted into the follwing. The Content of the snippet will be placed in a snippet file inside of the snippet folder in your theme.
Disclaimer:
While not mandatory, following this step enhances the structure of your theme and makes it more reader-friendly for other Shopify developers.
Miscellaneous
During the development, we got some ideas how to enhance the capability oft the process. Therefor, we implemented a view tags.
li-attribute
The first one we want to present is li-attribute. This tag allows us to use reserved attributes like class or src on every element. This is an example on how to use it:
If you don’t want to bind the value to an HTML attribute directly, you can use li-attribute:liquid. This will insert the entire value as an attribute. This is useful, for example, to check a radio button based on a Liquid condition:
li-liquid
When using Liquid code directly in Shopify, Webflow may disrupt the formatting of double quotes. To prevent this, we’ve introduced li-liquid, which you can add to Custom Code elements or script tags. During conversion, it detects the Liquid code and preserves the formatting.
li-tag
Use li-tag to wrap a string within a Liquid tag {% ... %}, ideal for assigning, incrementing, decrementing or capturing a variable.
li-paginate
When using a forloop with li-for, you can manage pagination using the li-paginate tag. Inside the li-paginate tag, you’ll have access to the pagination object. This is useful, for example, on collection pages. By default, only 50 products are rendered, but with li-paginate, you can override this limit.
li-cloak
Elements with the li-cloak attribute are hidden using CSS. The li-cloak tag is removed during conversion. This helps keep them out of view in the Webflow Designer and can make editing easier. To make it work, you need to add this CSS line to your project’s <head>: [li-cloak] { display: none !important; }. It’s already included in the Starter Template.
JavaScript Events
This document outlines the JavaScript events used in minicart.js and custom.js. These events help manage cart interactions, updates, and notifications within the shopping experience.
Events in minicart.js
carttotalitems
- Description: This event is triggered to update the total number of items in the cart.
- When: After retrieving the cart data in the getCart method.
- Data: The number of items in the cart.
cartupdated
- This event is triggered to indicate that the cart has been updated.
- When: After successfully updating the item quantity in the cart in the updateCartItemQuantity method.
- Data: No additional data.
showcartmessage
- Description: This event is triggered to display a message in the cart.
- When: After successfully or unsuccessfully updating the item quantity in the updateCartItemQuantity method.
- Data: An object containing status, message, and description.
currentcartitems
- Description: This event is triggered to transmit the current items in the cart.
- When: After retrieving the cart data in the returnCartItems method.
- Data: An array of the current cart items (this.cart.items).
Events in custom.js
cartupdated
- Description: This event is triggered to indicate that the cart has been updated.
- When: After adding products to the cart in the methods addToCartWithBundle, addToCart, and addGlobalBundleToCart.
- Data: The current products in the cart (this.products).
toggleminicart
- Description: This event is triggered to show or hide the mini cart.
- When: After adding products to the cart in the methods addToCartWithBundle and addGlobalBundleToCart.
- Data: No additional data.
showcartmessage
- Description: This event is triggered to display a message in the cart.
- When: After adding products to the cart in the methods addToCartWithBundle, addToCart, addGlobalBundleToCart, and in case of errors in these methods.
- Data: An object containing status, message, and description.
Liquify Elements
Use Liquify elements to enhance the user experience for your customers.